ElectrumCore Manual
Download PDF
Global
Analyse input level - ElectrumCore features an automatic input level setup, which makes sure everything sounds as good as possible no matter what equipment and guitar you are using. Push the button and play as hard as you can for a few seconds. ElectrumCore will adapt to your style and dynamics and will find a perfect working point for all the included components. Then unpush the button to make sure the level stays consistent.
Input - Use to crank the input gain for your instrument. Shouldn't be needed if you use the Analyse input level feature.
Bassman - Controls the level of the "sub" generated by the plugin. It lets you play "something like a bass" using your guitar. Works well only for single notes, not chords.
Output - Control the plugin's overall output level.
Limiter - Protects the output signal from going over 0 dB.
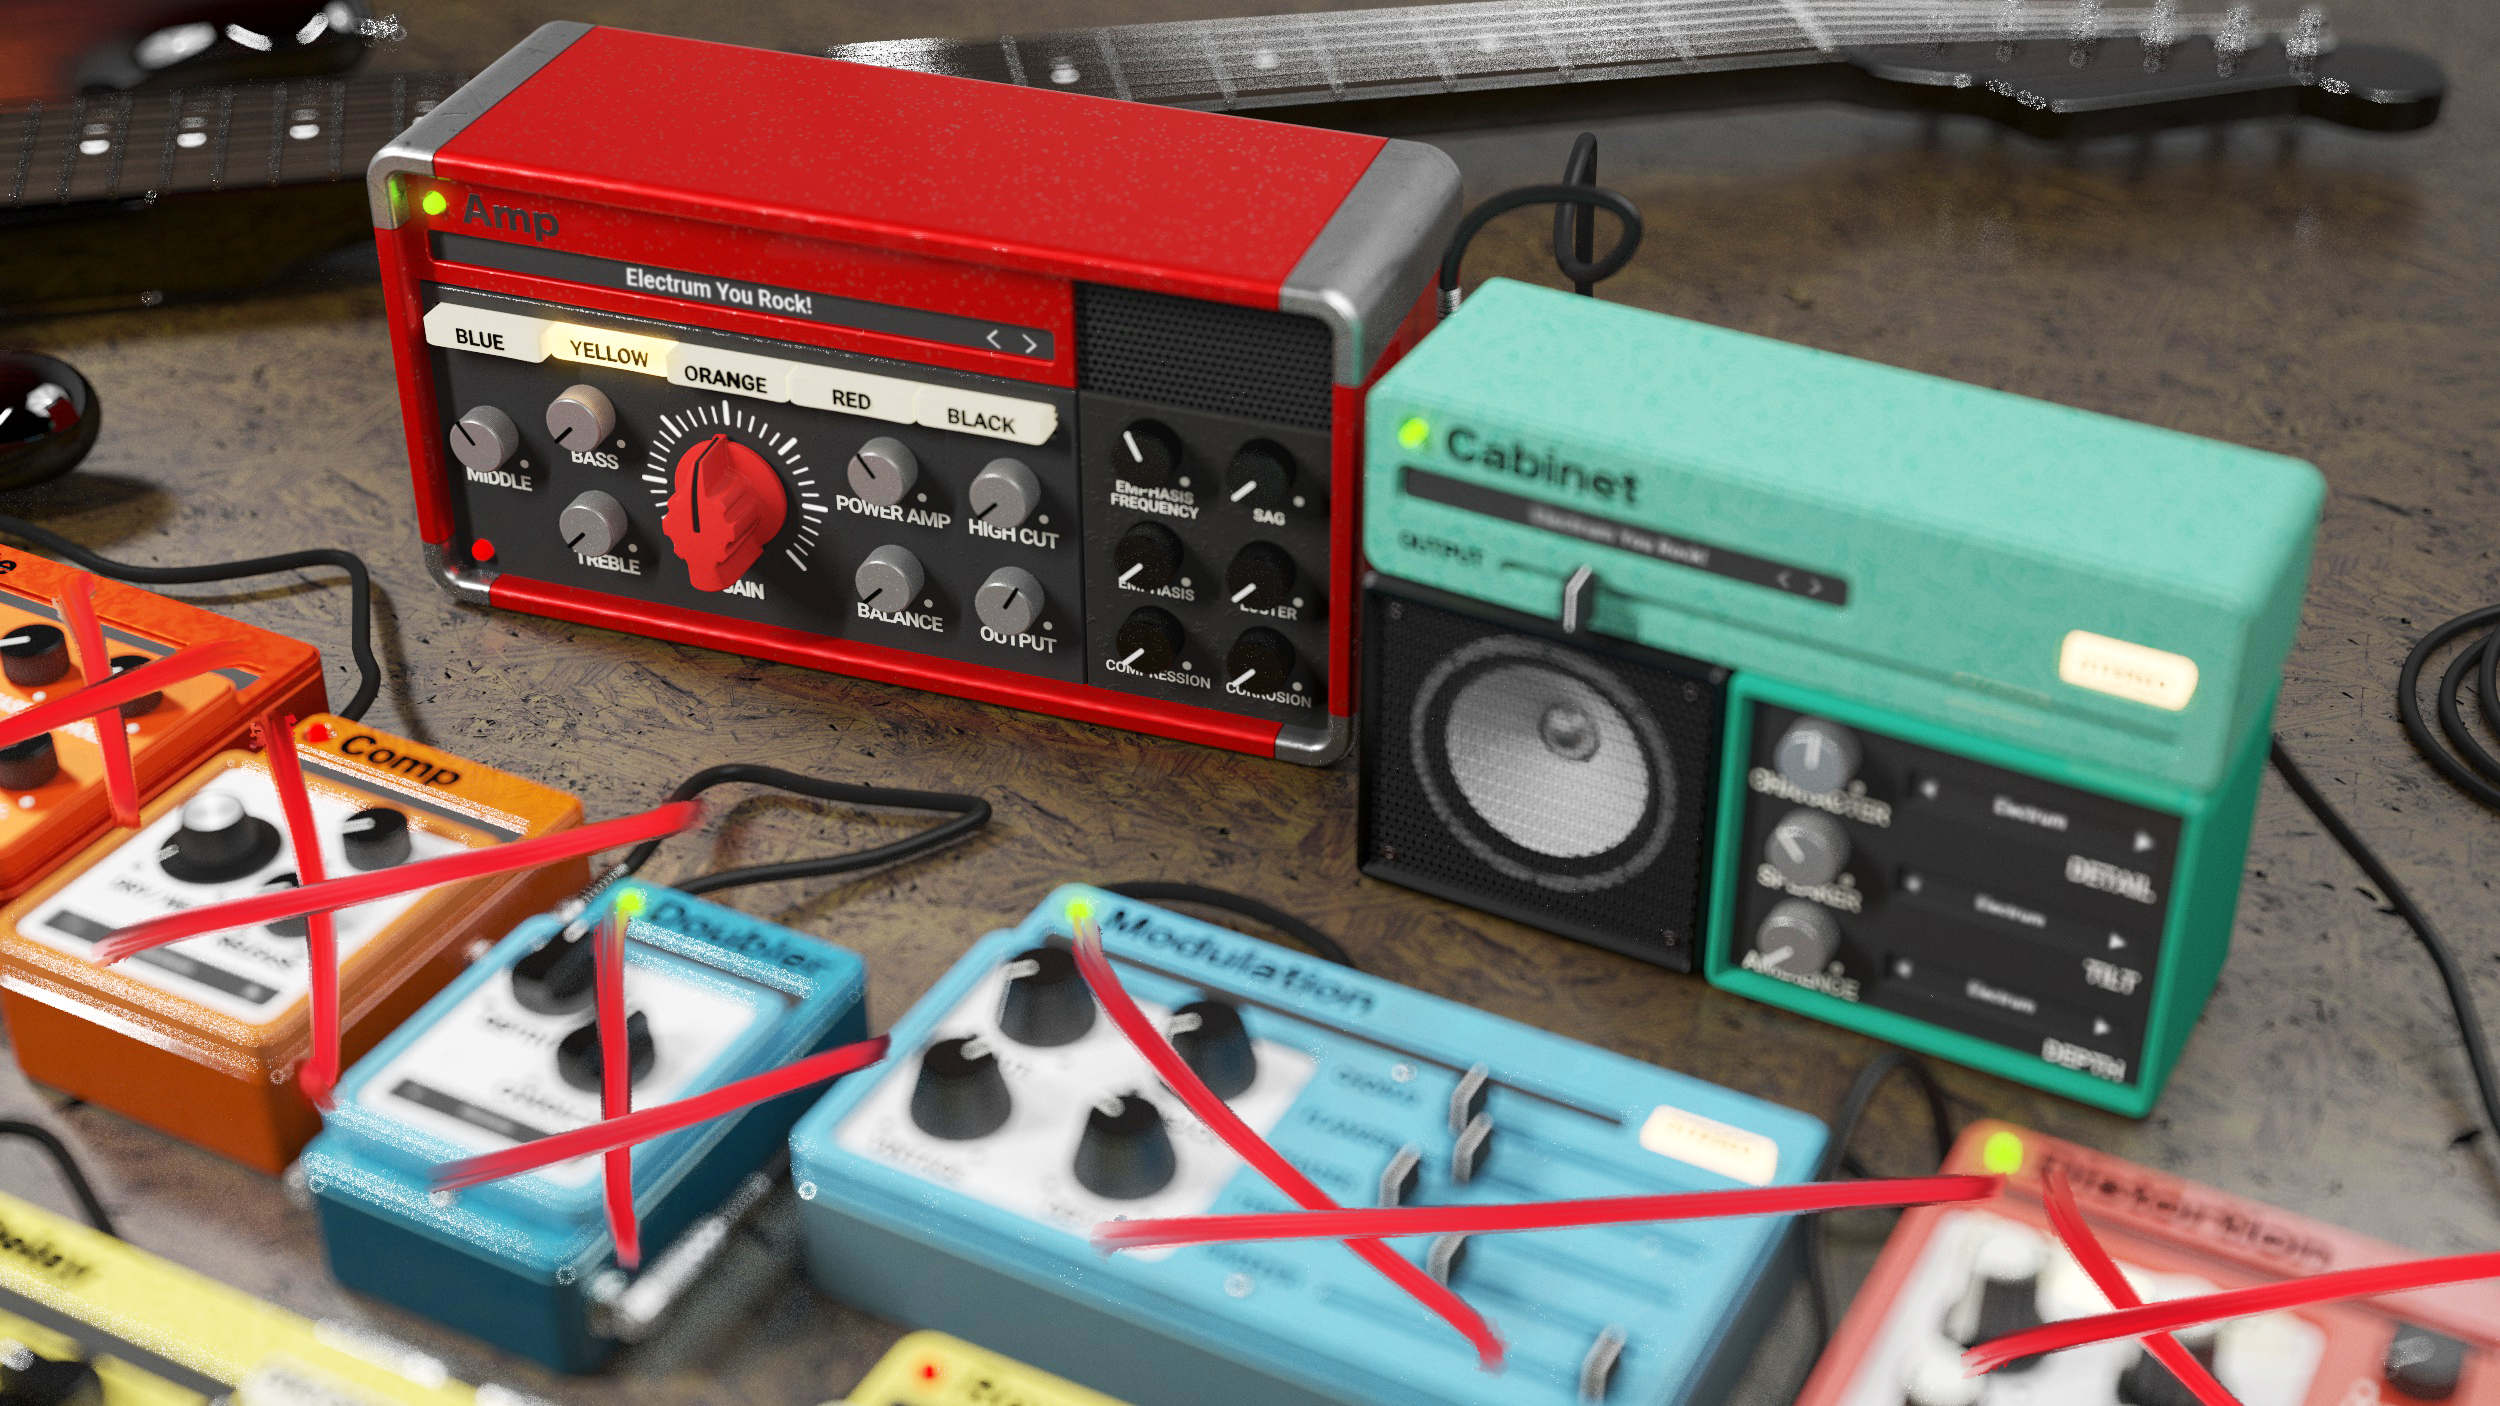
Amp

Electrum's amp section is the core of the whole effect. It features 5 extra versatile amps for all genres, sorted from the lightest to the most extreme ones. For easier operation and transparency all of them feature the same controls.
Gain - Controls the input gain of the simulated amp. The higher the value is the more distorted sound you get.
Bass - Controls the amount of low frequencies of the amp's EQ
Middle - Controls the amount of middle frequencies of the amp's EQ
Treble - Controls the amount of high frequencies of the amp's EQ
Poweramp - Defines the amount of the distortion produced by the poweramp, the second stage of the amp. While poweramps are usually only present on high gain amps, we took the liberty to introduce them in the low gain amps as well, just so you have more control about the amp character.
High-cut - High-cut filters are useful to remove the high frequency content, which often gets too bright and difficult to mix.
Balance - Defines the amps tonal character - (-100% darkest/+100% brightest sound).
Output - Controls the output gain.
Tightmode - Tight mode filters out additional low frequency content from the input. Low frequencies have naturally higher level, which can quickly overload the amp and produce sort of undefined output character. While amps naturally control the low end, this switch lets you get additional control and is especially useful for more agressive styles.
Emphasis Frequency - Defines the emphasis frequency, which lets you additionaly customize the amp. Prefiltering the guitar sound itself has profound effect to the character of the distortion. This lets you create a truly "your" sound.
Emphasis - Accents frequency determined by Ephasis Frequency control, which you can use to customize the amp and get a truly "your" sound.
Compression - Controls the amount of compression applied to the guitar tone. 0% = no compression, 100% = heavy compression. Tube amps naturally compress the signal, but the amount is usually quite negligible, so the default 0% is usually a good choice.
Sag - Sag simulates the drooping of the power supply voltage in response to large transient signals. Adds a certain dynamic "feel" to the tube amplifier that is not generally found in solid-state amplifiers.
Luster - Adds extra brightness and sparkling to the sound of the amp.
Corrosion - Applies rust and dirt and the analogue feel to the amp section.
Cabinet
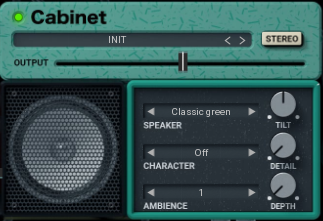
Cabinet section of Electrum is unlike anything else. It doesn't let you load your IRs etc., instead it produces a true virtual amp simulator with several parameters, which let you easily setup the amp instead of a neverending search through thousands of IR files you may be unfortunate to be used to. Our cabinet simulator also produces much smoother and natural sound, which avoids the unnatural resonances present with almost all classic IRs.
Speaker - Speaker lets you select fromj 16 predefined speaker sounds based on some classic speaker measurements. It provides the basis of the cabinet sound.
Character - Character lets you further customize the cabinet sound. Together with Speaker you get over 300 virtual cabinets.
Output - Controls the output gain.
Tilt - Tilt lets you make the cabinet darker (below 0) or brighter (above 0) using a very natural tilt filter.
Detail - Detail lets you add resonances to your cabinet. The character of these resonances depends on the Character parameter.
Stereo - Stereo switch makes the cabinet produce a stereo width. Sort of like using a good combination or cabinet IRs, but here every combination will sound "good".
Ambience Bank - Ambience bank selects an ambience response you can add to your cabinet. This simulates the reflections from surroundings of the real cabinet.
Depth - Depth controls the amount of ambience mixed in.
ElectrumCore Top Toolbar
ElectrumCore features several standard controls, which can improve your workflow.
A, B and Copy buttons - The plugin remembers 2 sets of settings, A and B. Clicking any of these 2 buttons switches between these 2 settings. The selected one is highlighted in red. This is a great way for A/B checking and selecting the best settings. "Copy" button copies the current settings to the other slot (if A is currently selected, the button will copy the current settings to slot B).
Presets and right and left arrows
The plugin comes with a set of presets, which should do the trick for most cases. Access them using the right and left arrows, or by clicking the preset field directly. There you can save and manage your own presets as well. On your computer presets are stored in the following paths:
Windows:
C:\Users\username\Documents\Muramasa\Electrum
Mac OS X:
HOME/Documents/Muramasa/Electrum
Undo and Redo buttons
All of us make a mistake from time to time, which is when these two buttons come in handy. Undo button reverts your last change, Redo puts it back.
Bypass button - It is always a good idea to check if the plugin actually improves your sound, which is what the bypass button is for. In many DAWs it will be in sync with the DAW's bypass button (if it has one).
3D/2D button - hitting this button allows you to choose between 2D and 3D graphical user interfaces. It has absolutely NO effect on SOUND nor on CPU usage.
Right-Click
Right-click anywhere in the plugin background with the right mouse button and you will get access to the following features.
Change oversampling settings (Plugins that support oversampling only)
Scale GUI precisely by per-cent.
Get the version info.
Access product web page, reach support and access online documentation.
Contact support
Open presets folder (to add, arrange or delete presets manually)
Activate/Deactivate the plugin
Access Licence manager (to activate or deactivate the plugin or several plugins at the same time)
Disable/Enable GPU Acceleration.
Disable/Enable Intelligent sleep on silence function that disables the plugin when no sound is on input or output to save the CPU power.
Right-click any control (knob, button) to access help for the particular parameter.
Double-click Menu
Some parameters let you access more accurate numeric settings by double-clicking the knobs.
Installation and maintenance
Installation is a quick and simple process involving downloading and using a standard installer on both platforms, Windows and Mac OS X. The installer places the plugins and presets into proper locations so that your DAW can easily find them. The plugin is available for all relevant interfaces: VST, VST3, AAX, and AU. Note that on OS X since High Sierra you may need to restart your computer to make your DAW find new plugins.
If you find yourself in trouble, please contact us via info@unitedplugins.com.
Updating
Updating the plugin to the newest version is as simple as using the newest installer.
Uninstallation
Windows
You can either use the link to the uninstaller in the start menu by typing ElectrumCore for example or it can be accessed via Control panels / Applications /
Mac OS X
First delete the plugin files manually from:
AU: /Library/Audio/Plug-Ins/Components
VST: /Library/Audio/Plug-Ins/VST
VST: /Library/Audio/Plug-Ins/VST3
AAX: /Library/Application Support/Avid/Audio/Plug-Ins
Then if you really want to get rid of all data created by the plugin, remove the following folders as well:
HOME/Documents/Muramasa/ElectrumCore
HOME/Library/Application support/Muramasa/ElectrumCore
Note: Since OS X 10.7 (Lion), many folders are marked as hidden by default. To make them visible again in Finder, please follow this tutorial.
Trial and activation
Initially, ElectrumCore is in demo mode. That lets you evaluate the plugin, try it in your mixing/mastering sessions and make sure it really does the trick. When ready, purchase a license from our shop (by clicking on the Electrum logo in the middle) or any of our resellers. You will receive a so-called license file, which you download to your computer. The plugin displays an ACTIVATE button when in trial mode, so click on it and select the license file. The plugin will check the license and activate the license on your computer. After you restart your DAW, the plugin will be activated and will work indefinitely without restrictions. You can use the plugin on all your computers.
Support
Now that you’ve taken the time to learn all about ElectrumCore, enjoy and make your sound awesome! If our plug-ins helped you take your production to the next level, let us know, we’d love to hear from you and what you were able to create with our software.
If you encountered any problems, we offer free technical support for all registered users. Start with the frequently asked questions here:
http://www.unitedplugins.com/faq
If you need further assistance, you can find our Customer Support contact form at:
http://www.unitedplugins.com/contact
You can also reach our support staff by e-mail at:
info@unitedplugins.com