Transmutator Manual
Download PDF

Transmutator has many uses including, transitioning from different sections in tracks (for example verse to chorus or build-up to drop), mixing between two songs (for example in a DJ set), or sound design by fusing and morphing two elements together in various creative ways.
Transmutator Controls
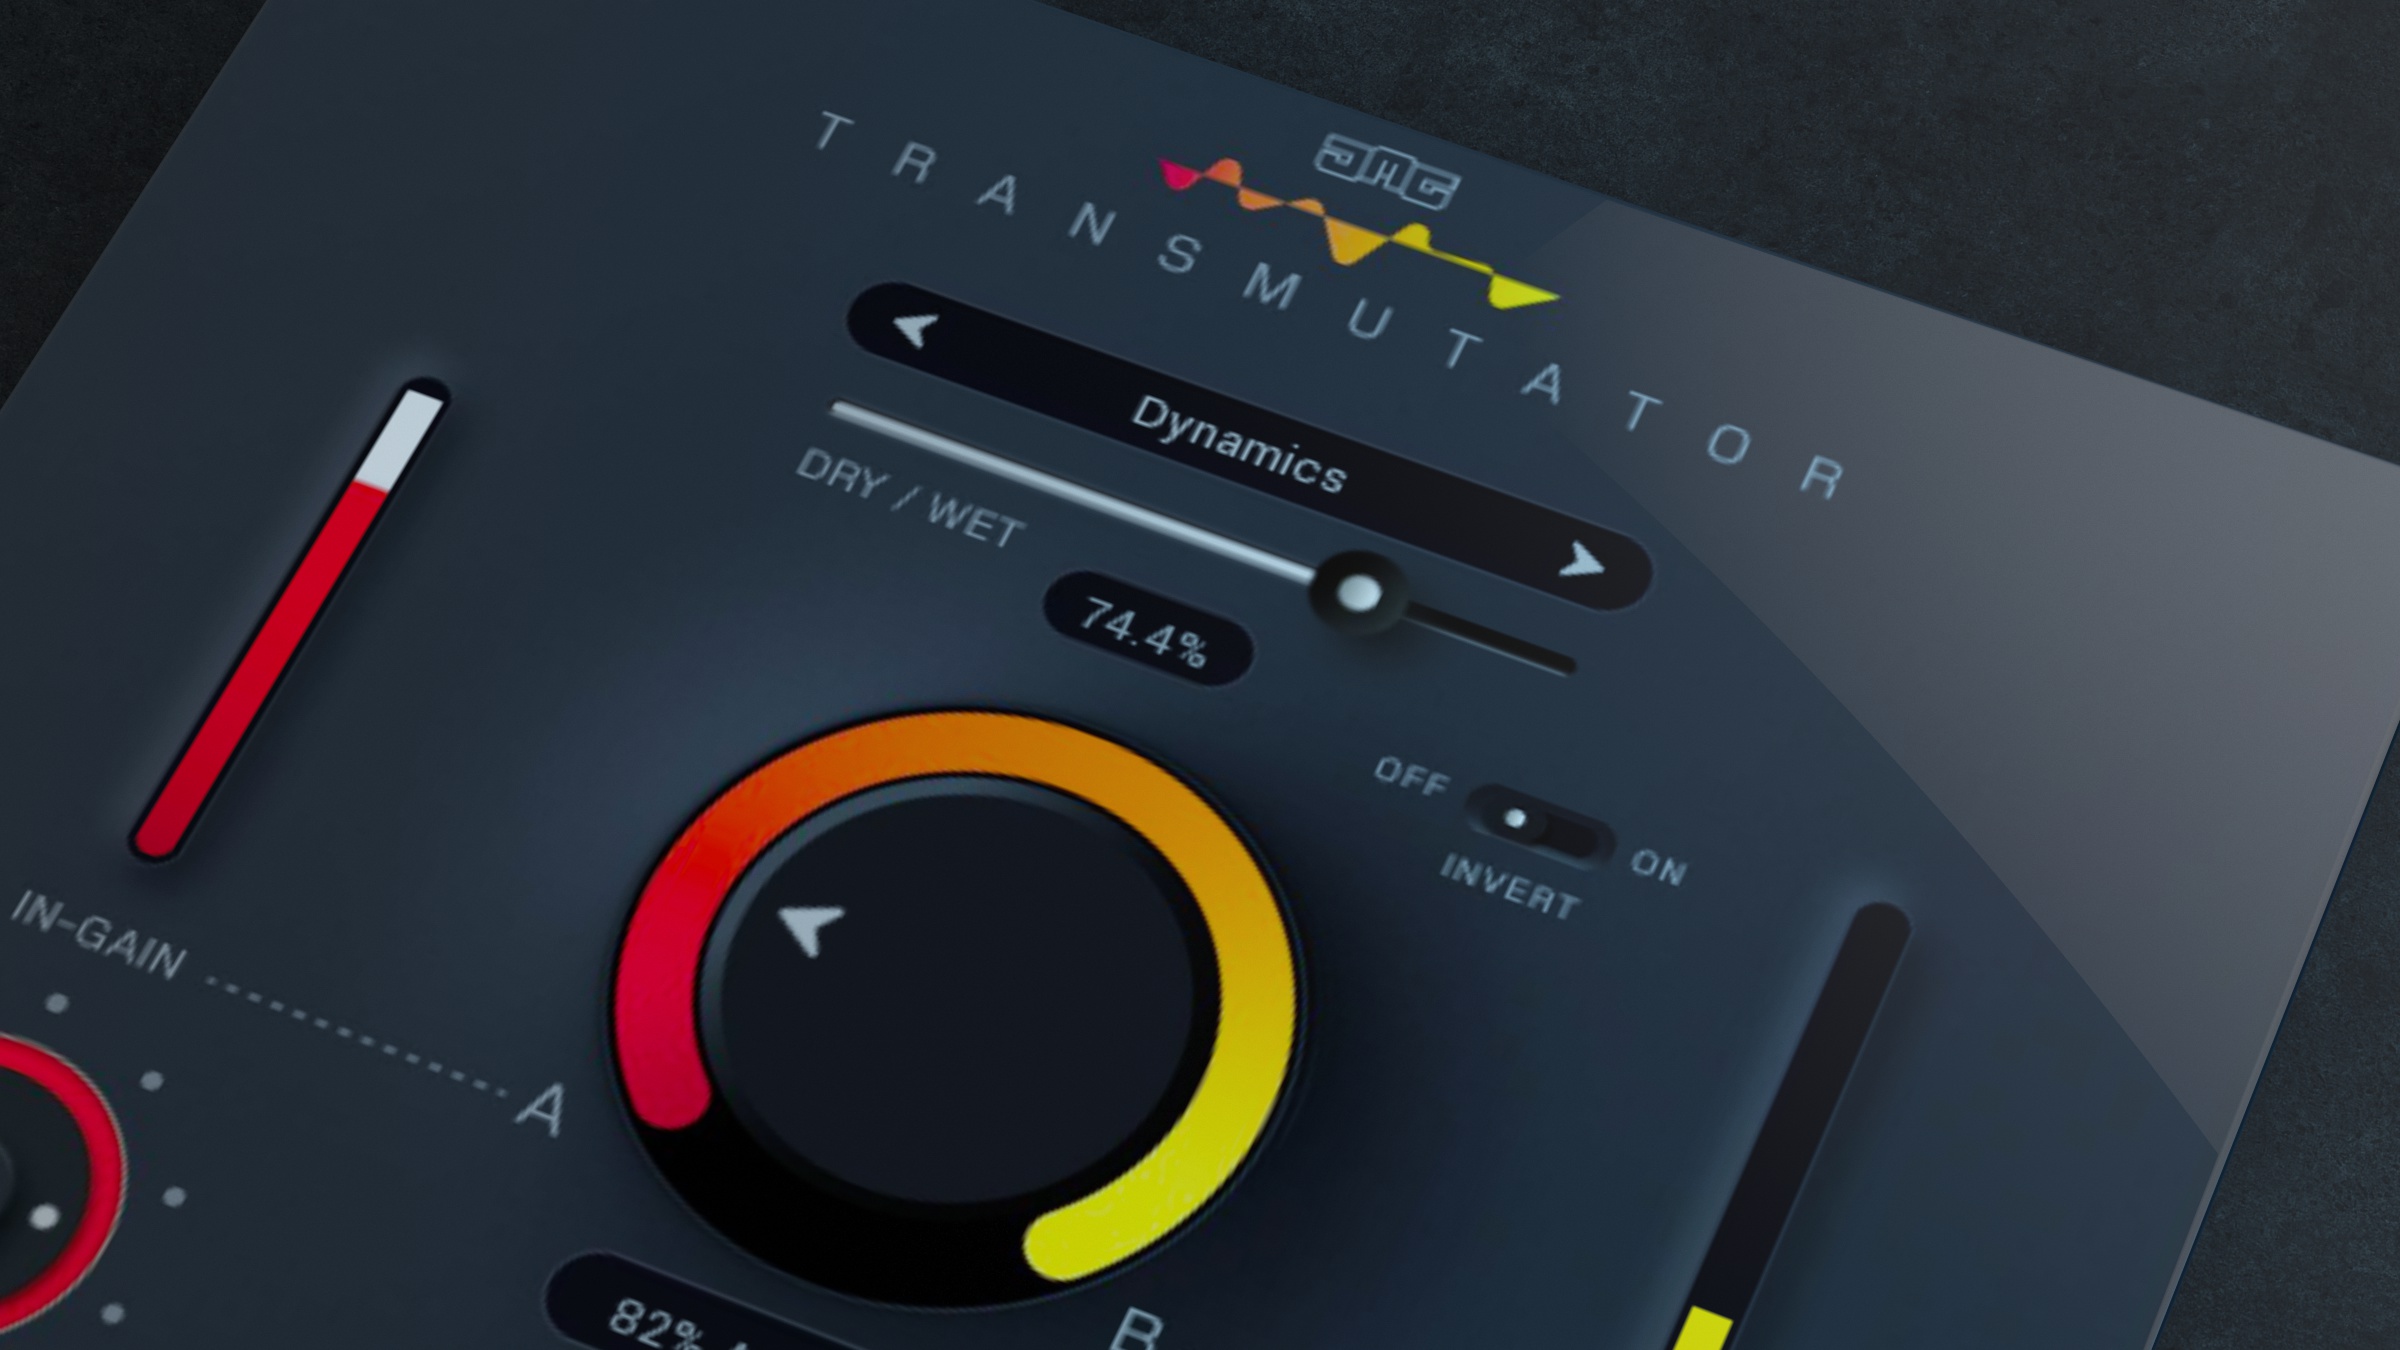
Dry/Wet - Blends between a standard volume crossfade and the effect of the currently selected mode. This allows for reducing the strength of the effect.
Invert - Switches the mode behaviour. It is different depending on the currently selected mode. This behaviour is specified in the description of each "Mode".
![]()
Gain In A & B - Are used to adjust the input and sidechain input signals from -24dB to +24dB. They are useful to help balance the two inputs to be similar in level. These gains are applied before the meters, so the meters act as a further visual representation to aid this balancing.
Gain Out - Is the last control in the signal chain and adjusts the level from -24dB to +24dB. It is useful to help balance the inputs and output to be similar in level.
![]()
Modes
Transmutator offers 16 blend modes, the effectiveness of each "Mode" depends entirely on the input signals. While generally it is advised to simply try the modes to see which sound best with your chosen audio, below are details for each mode that explain how the processing works.
![]()
Filter - A high-pass filter is applied to "A" and a low-pass to "B". The transition from 0% to 100% is the frequency of both filters increasing from 20Hz to 20kHz. This makes it sound like the transition is moving upwards. If "Invert" is enabled, then "A" has low-pass and "B" has high-pass, which sounds like the transition is moving downwards.
Spectrum - This uses spectral processing to separate the tonal and noise elements from the inputs. From 0% to 50% the noise from "A" is crossfaded with the noise from "B". So at 50%, you will hear the tone from "A" and the noise from "B". From 50% to 100% the tone from "A" is crossfaded with the tone from "B". In other words, the noise is transitioned first and the tone second, however, if "Invert" is enabled then the tone will be first and then the noise.
Morph - Uses an advanced spectral algorithm to blend the two inputs. The processing is not symmetrical, so "Invert" will flip the signals, which will give a very different result.
Stereo - Splits the inputs into their mid and side components. From 0% to 50% the mid from "A" is crossfaded with the mid from "B". So at 50%, you will hear the side from "A" and the mid form "B". From 50% to 100% the side from "A" is crossfaded with the side from "B". In other words, the mid is transitioned first and the side second, however, if "Invert" is enabled then the side will be first and then the mid.
Pan - Splits the inputs into their left and right components. From 0% to 50% the left from "A" is crossfaded with the left from "B". So at 50%, you will hear the right from "A" and the left form "B". From 50% to 100% the right from "A" is crossfaded with the right from "B". In other words, the left is transitioned first and the right second, however, if "Invert" is enabled then the right will be first and then the left.
Transients - Splits the inputs into their transient and tail components. From 0% to 50% the tail from "A" is crossfaded with the tail from "B". So at 50%, you will hear the transient from "A" and the tail form "B". From 50% to 100% the transient from "A" is crossfaded with the transient from "B". In other words, the tail is transitioned first and the transient second, however, if "Invert" is enabled then the transient will be first and then the tail.
Dynamics - Splits the inputs into their quiet (below the threshold) and loud (above the threshold) components. From 0% to 50% the quiet from "A" is crossfaded with the quiet from "B". So at 50%, you will hear the loud from "A" and the quiet form "B". From 50% to 100% the loud from "A" is crossfaded with the loud from "B". In other words, the quiet is transitioned first and the loud second, however, if "Invert" is enabled then the loud will be first and then the quiet.
Follow - Measures the amplitude shape of both inputs. From 0% to 50% the amplitude information from "B" is applied to "A". So at 50%, you will hear the sound of "A" with the amplitude shape of "B". From 50% to 100% there is a simple crossfade to "B". If "Invert" is enabled then, from 0% to 50% the sound crossfades from "A" to "B" while keeping the amplitude shape from "A". Then from 50% to 100% the amplitude shape is transitioned from "A" to "B".
Liquid - Splits the inputs into 64 spectral bands. From 0% to 50% the odd bands from "A" are crossfaded with the odd bands from "B". So at 50%, you will hear the even bands from "A" and the odd bands form "B". From 50% to 100% the even bands from "A" are crossfaded with the even bands from "B". In other words, the odd bands are transitioned first and the even bands second, however, if "Invert" is enabled then the even bands will be first and then the odd bands.
Multi - Splits the inputs into 6 frequency bands. From 0% to 50% the odd bands from "A" are crossfaded with the odd bands from "B". So at 50%, you will hear the even bands from "A" and the odd bands form "B". From 50% to 100% the even bands from "A" are crossfaded with the even bands from "B". In other words, the odd bands are transitioned first and the even bands second, however, if "Invert" is enabled then the even bands will be first and then the odd bands.
Diffuse - Uses spectral processing to create random variations in each frequency. The transition from 0% to 100% increases the randomness of "A" and decreases for "B". If "Invert" is enabled there is an additional spectral smearing effect added to the randomness.
Wash - Uses reverb to make "A" seem to get further away as "B" gets closer. The transition from 0% to 100% simply increases the reverb for "A" and decreases for "B". If "Invert" is enabled the reverb time will be very short.
Blur - Uses spectral freezing and blurring. The transition from 0% to 100% increases the effect for "A" while decreasing for "B". If "Invert" is enabled the spectral window is much shorter, creating a more artificial effect.
Pitch - Uses pitch shifting to slide up or down by 2 octaves. The transition from 0% to 100% decreases the pitch of "A" from 0 semitones to -24 semitones, while fading to "B" that decreases pitch from +24 semitones to 0 semitones. If "Invert" is enabled the pitches will increase not decrease.
Shift - Uses frequency shifting to slide up or down by 1000Hz. The transition from 0% to 100% decreases the frequency of "A" from 0Hz to -1000Hz, while fading to "B" that decreases frequency from 1000Hz to 0Hz. If "Invert" is enabled the frequency will increase not decrease.
Degrade - Uses digital distortion to degrade the audio creatively. The transition from 0% to 100% degrades "A" while fading to "B" that is becoming less degraded. The standard mode uses rate reduction while "Invert" uses a sample and hold effect.
Right-click
Right-click anywhere in the plugin background with the right mouse button and you will get access to following features.
Change oversampling settings (Plugins that support oversapling only)
Scale GUI precisely by per-cent.
Get the version info.
Access product web page, reach support and access online documentation.
Contact support
Open presets folder (to add, arrange or delete presets manually)
Activate/Deactivate the plugin
Access Licence manager (to activate or deactivate the plugin or several plugins at the same time)
Disable/Enable GPU Acceleration.
Disable/Enable Intellingent sleep on silence function that disables the plugin when no sound is on input or output to save the CPU power.
Right-click any control (knob, button) to access help for the particular parameter.
Double-click Menu
Some parameters let you access more accurate numeric settings by double-clicking the knobs.
Presets and left-right arrows
The plugin comes with a set of presets, which should do the trick for most cases or give you a good starting point when tweaking your sound. Access them using the right and left arrows, or by clicking the preset field directly. You can save and manage your own presets there as well. In your computer, presets are stored in the following paths:
Windows:
C:\Users\username\Documents\JMGSound\Transmutator
macOS X:
HOME/Documents/JMGSound/Transmutator
Installation and maintenance
Installation is a quick and simple process involving downloading and using a standard installer on both platforms, Windows and Mac OS X. The installer places the plugins and presets into proper locations so that your DAW can easily find it. The plugin is available for all relevant interfaces: VST, VST3, AAX and AU. Note that on OS X since High Sierra you may need to restart your computer to make your DAW find new plugins.
If you find yourself in trouble, please contact us via support@unitedplugins.com.
Updating
Updating the plugin to the newest version is as simple as using the newest installer.
Uninstallation
Windows
You can either use the link to the uninstaller in the start menu by typing SubBass Doctor 808 for example or it can be accessed via Control panels / Applications /
macOS X
First delete the plugin files manually from :
AU: /Library/Audio/Plug-Ins/Components
VST: /Library/Audio/Plug-Ins/VST
VST: /Library/Audio/Plug-Ins/VST3
AAX: /Library/Application Support/Avid/Audio/Plug-Ins
Then if you really want to get rid of all data created by the plugin, remove the following folders as well:
HOME/Documents/JMGSound/Transmutator
HOME/Library/Application support/JMGSound/Transmutator
Note: Since OS X 10.7 (Lion), many folders are marked as hidden by default. To make them visible again in Finder, please follow this tutorial:
https://ianlunn.co.uk/articles/quickly-showhide-hidden-files-mac-os-x-mavericks/
Trial and activation
Transmutator is initially in demo mode, which lets you evaluate the plugin. Try it in your mixing/mastering sessions and make sure it really does the trick. When ready, purchase a licence from our shop or any of our resellers. You will receive a so-called licence file, which you download to your computer. The plugin displays an ACTIVATE button when in trial mode. Click it and select the licence file. The plugin will check the licence and activate the licence on your computer. After you restart your DAW, the plugin will be activated and will work indefinitely without restrictions. You can use the plugin on all your computers.
Support
Now that you’ve taken the time to learn all about Transmutator, enjoy and make your sound awesome! If our plug-ins helped you take your production to the next level, let us know, we’d love to hear from you and what you were able to create with our software.
If you encountered any problems, we offer free technical support for all registered users. Start with the frequently asked questions here:
http://www.unitedplugins.com/faq
If you need further assistance, you can find our Customer Support contact form at:
http://www.unitedplugins.com/contact
You can also reach our support staff by e-mail at:
support@unitedplugins.com